Guide to help with installing GameCMS on DirectAdmin
About this content

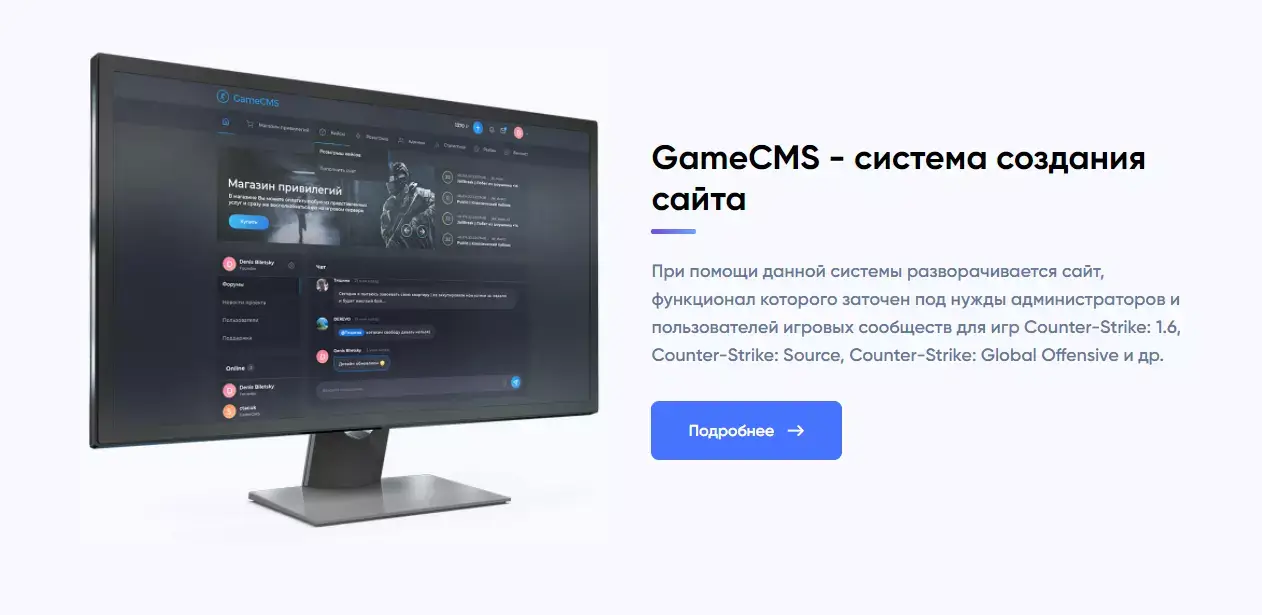
Guide to installing the GameCMS Nulled script on web hosting managed by DirectAdmin.
As always, for the demonstration we'll use the web hosting of our partner CSHOST.FUN (They provide web hosting completely free of charge to all clients, which is quite a big plus)
Part 1: Preparing the script files
The first step is to get the details from the web host
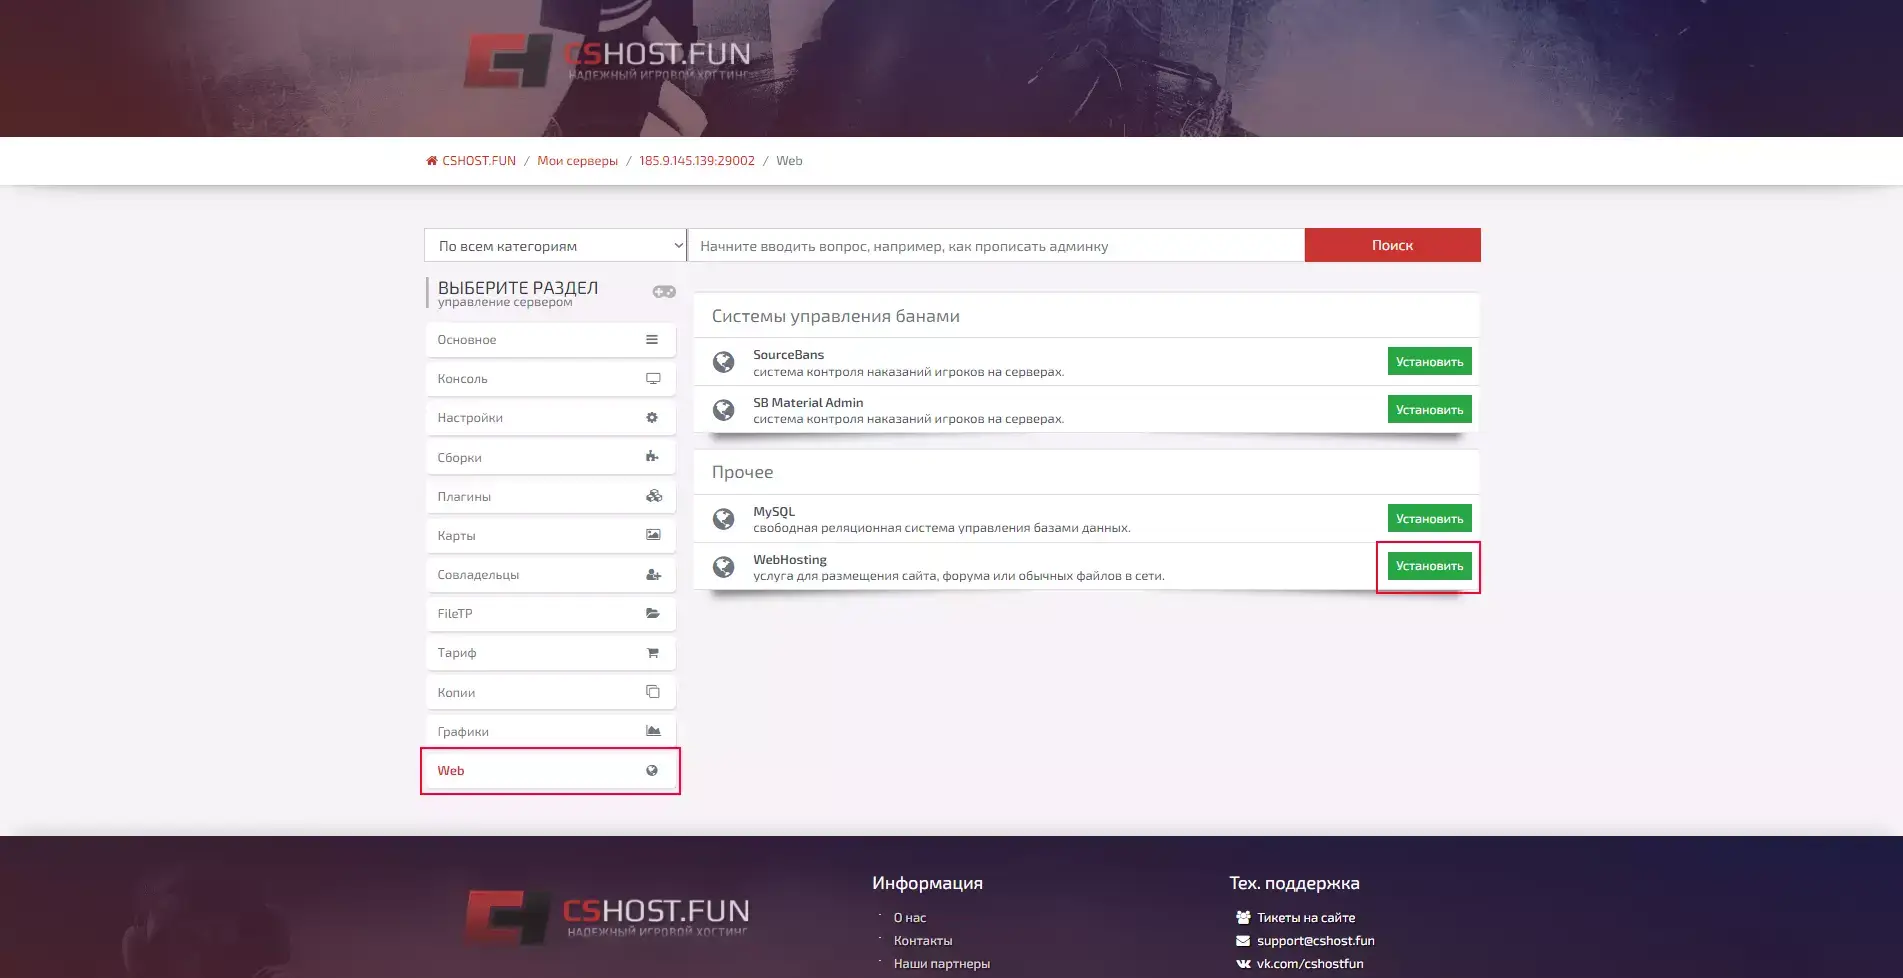
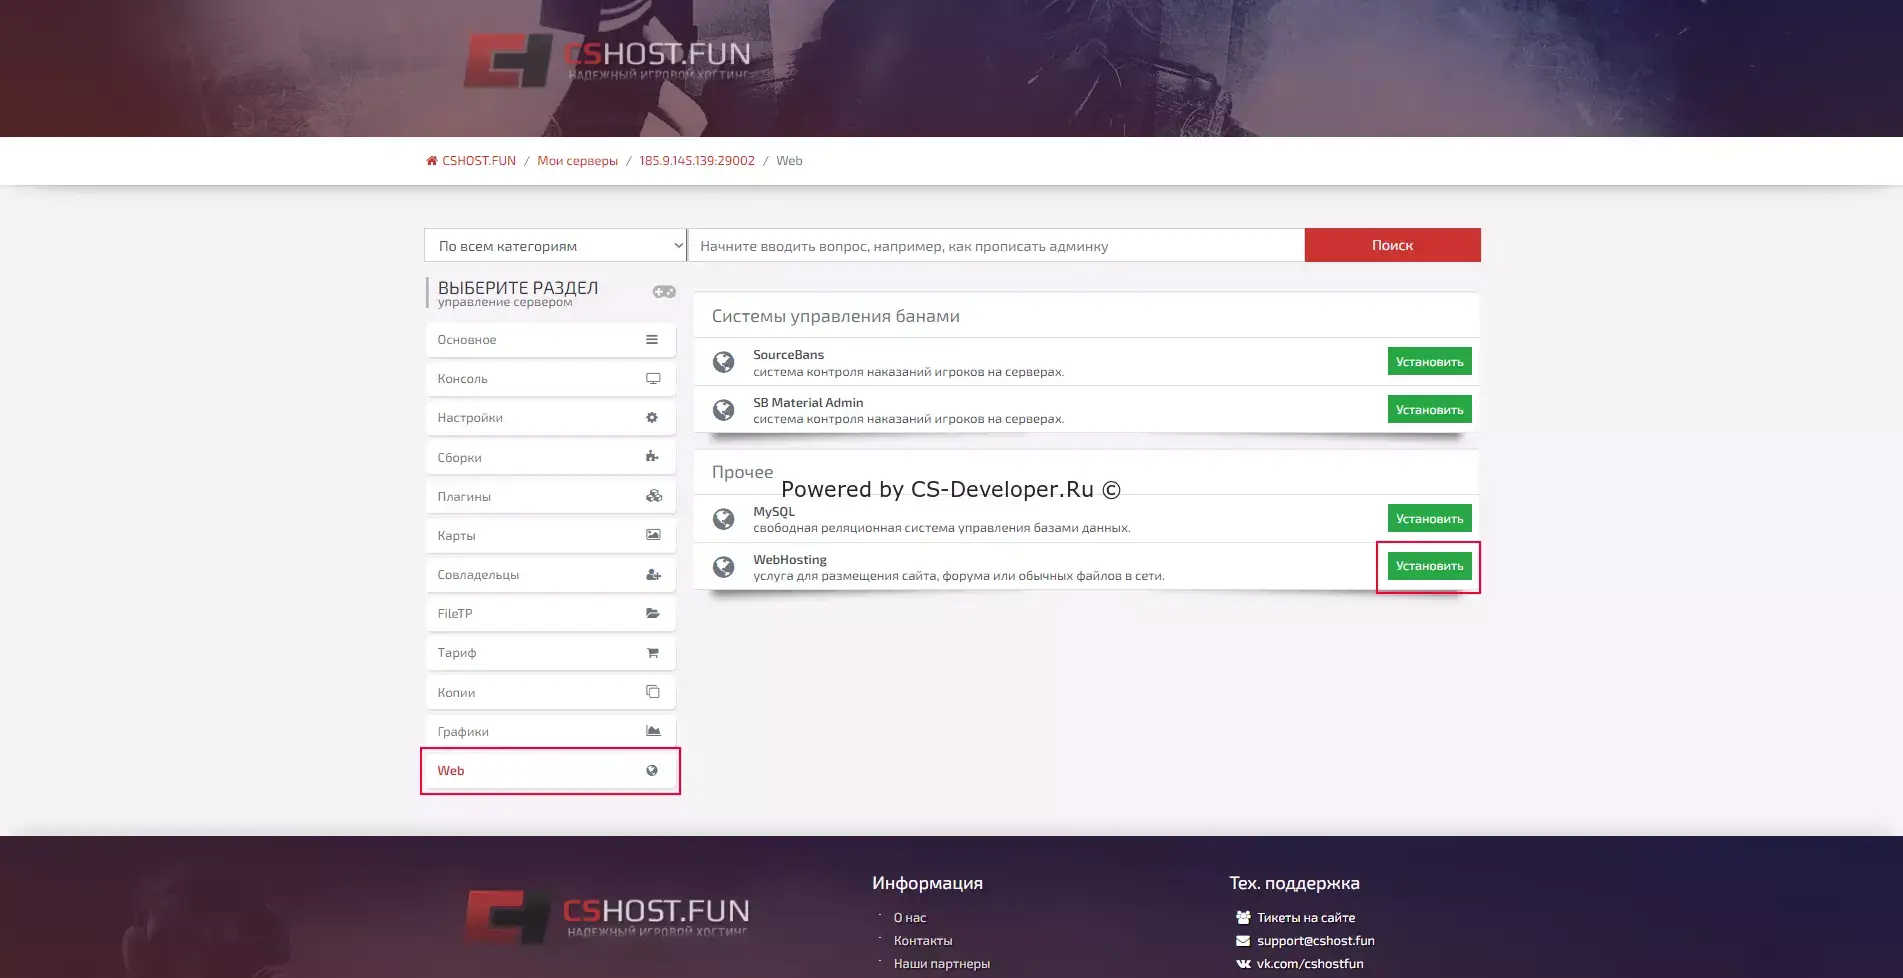
Go to the server control panel and select the "Web" tab
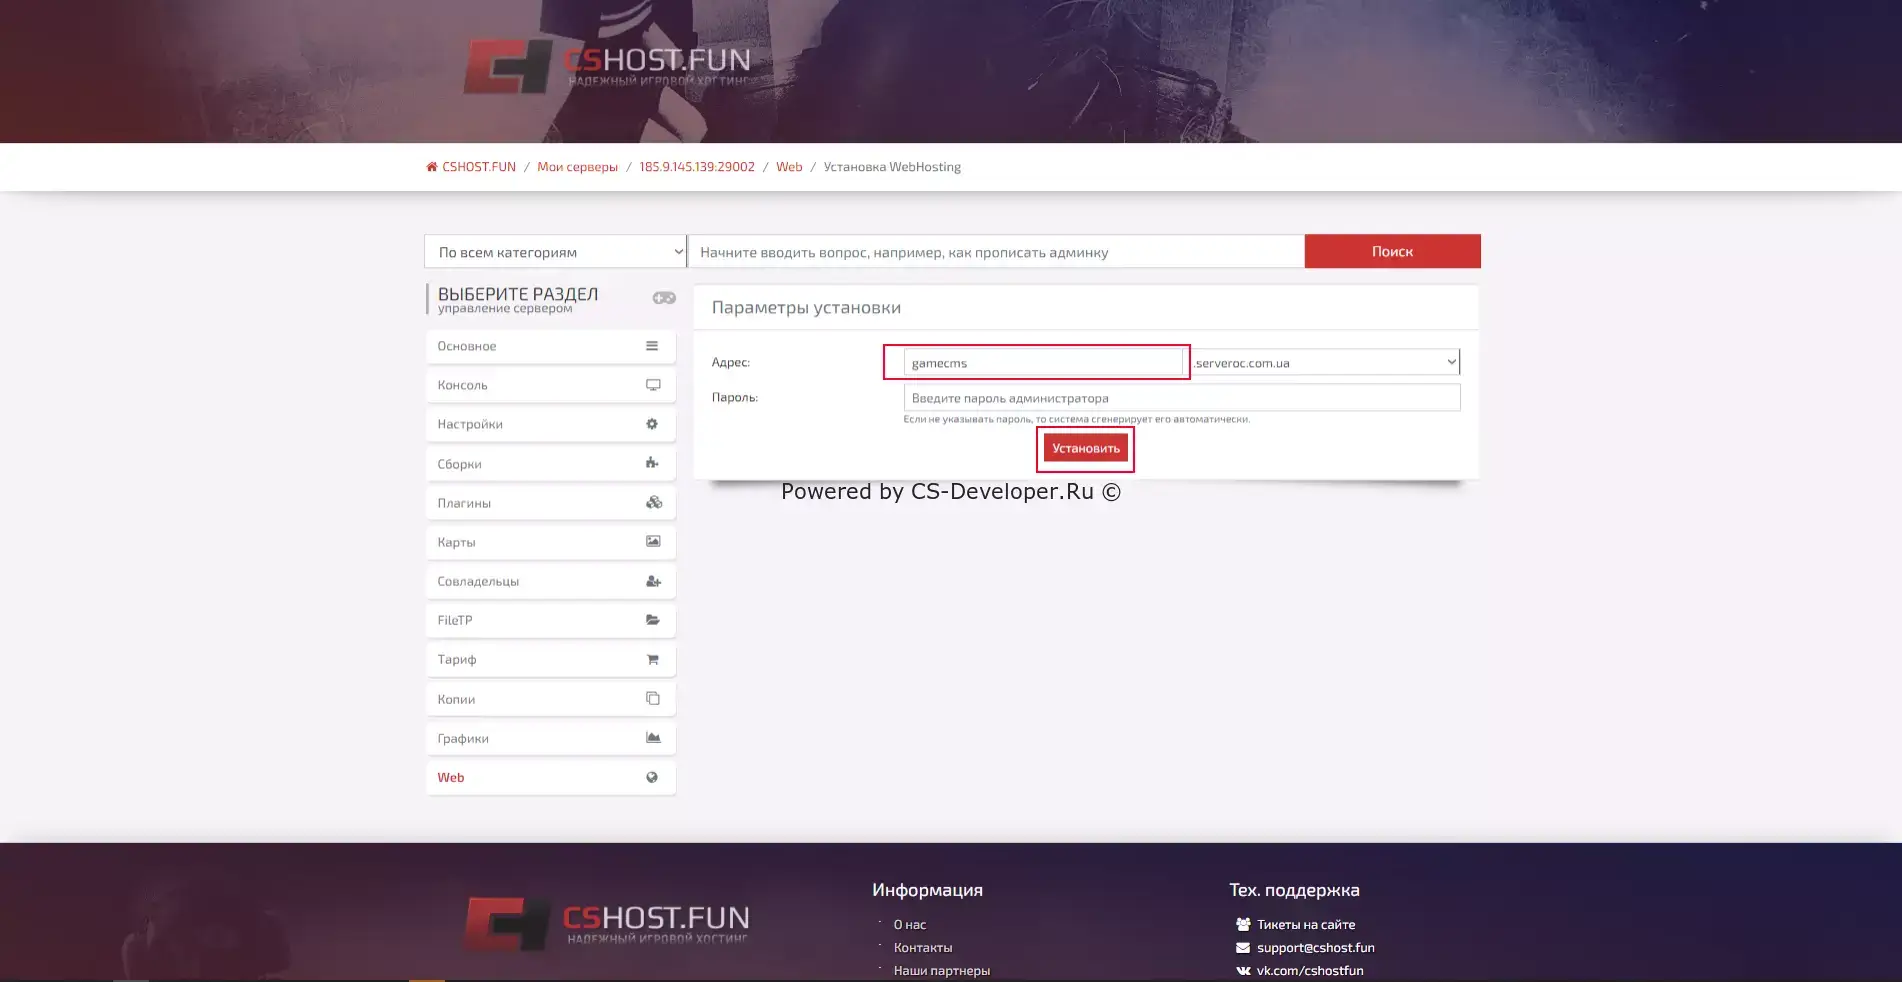
Next, enter the desired domain name and click the install button
Get the necessary details and go to the control panel.
When we log in, we are greeted by the panel's home page. We need to select the "System and Files" section, then the "File Manager" menu item
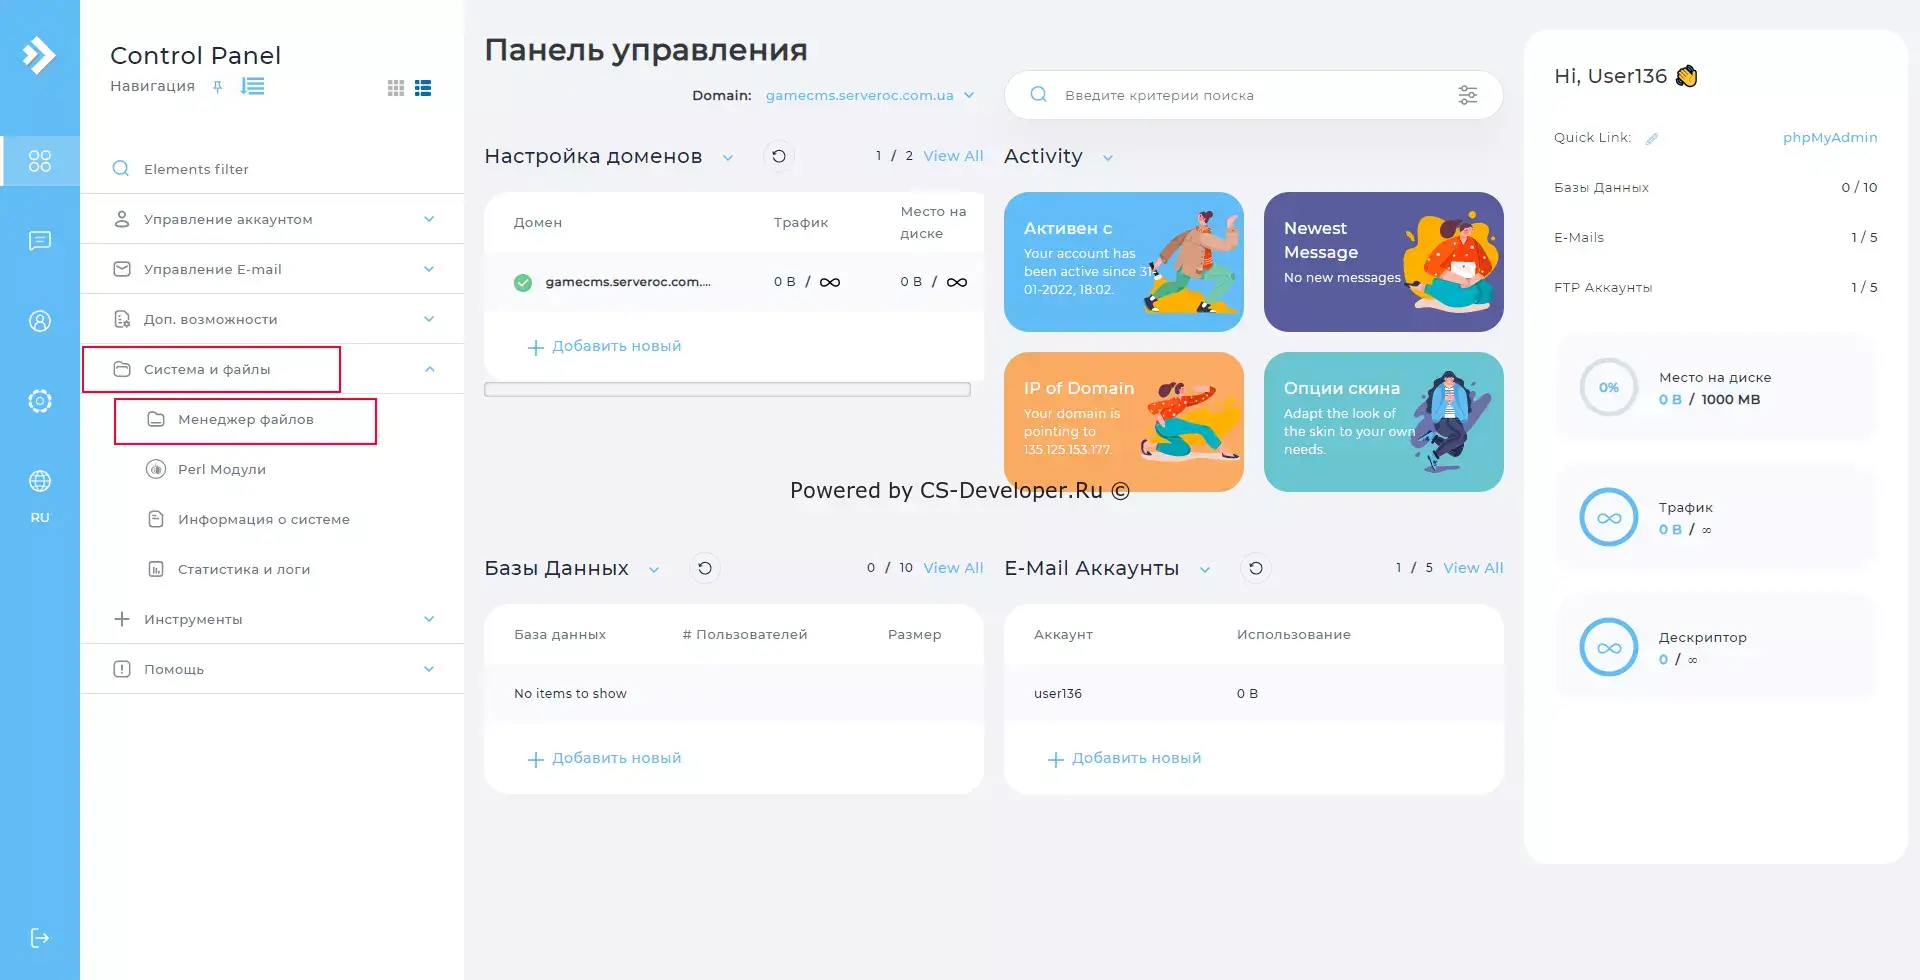
Once in the file manager, go to the path domains/gamecms.serveroc.com.ua/public_html (instead of gamecms.serveroc.com.ua enter your domain) and delete all the contents of the directory, namely the cgi-bin folder and the placeholder page
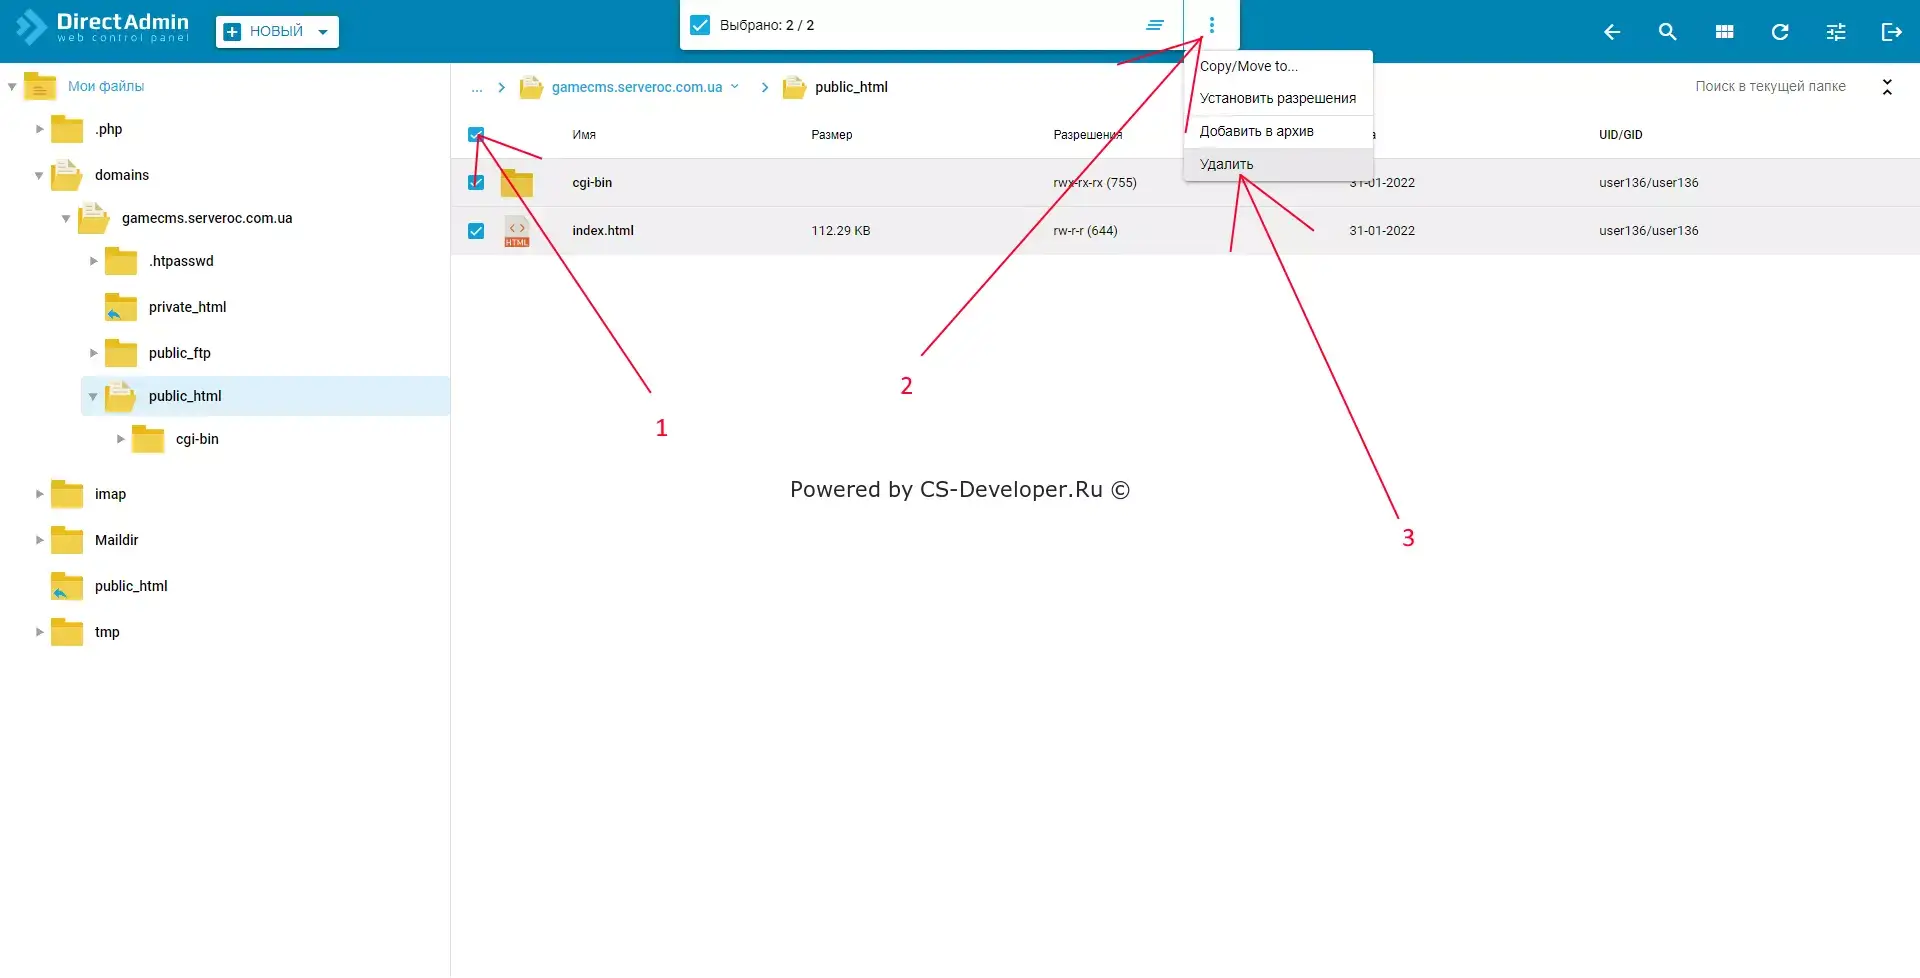
Confirm the deletion. Then simply drag the downloaded archive from the file explorer into the browser window.
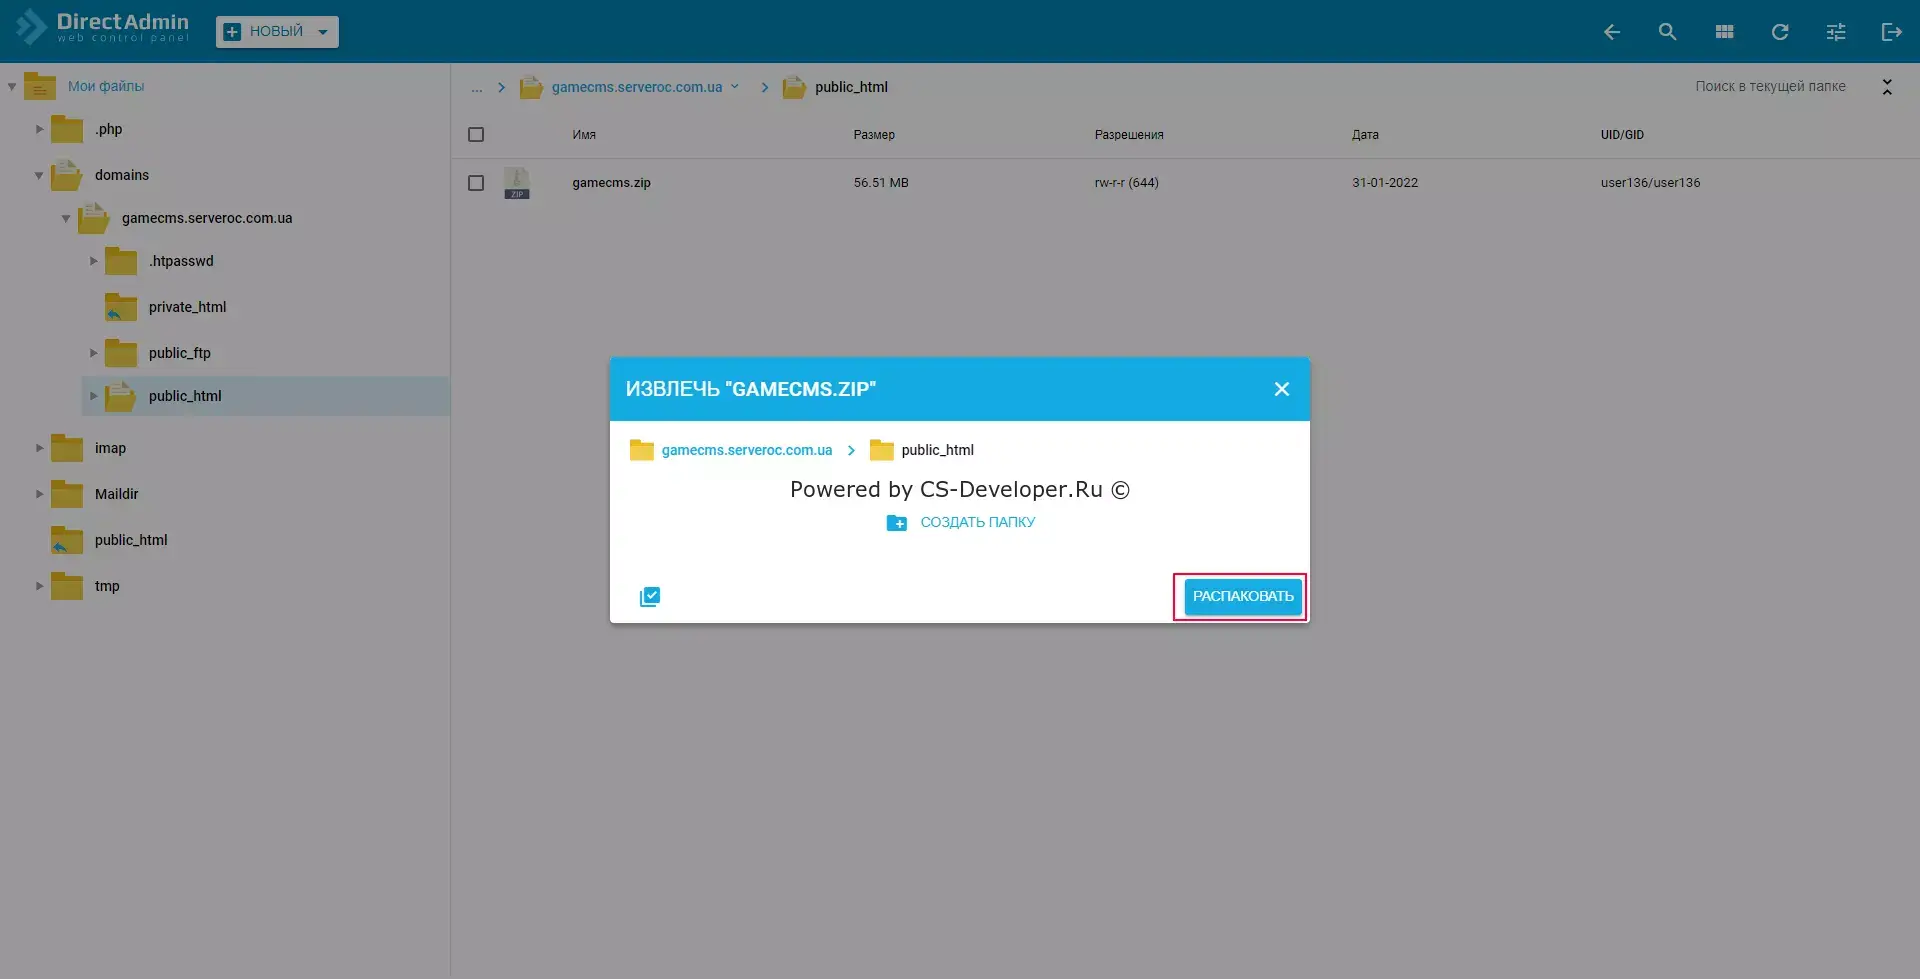
When the file has uploaded, you need to extract it — to do this, click the archive 2 times and wait for the modal window to appear. There, simply click the "Extract" button
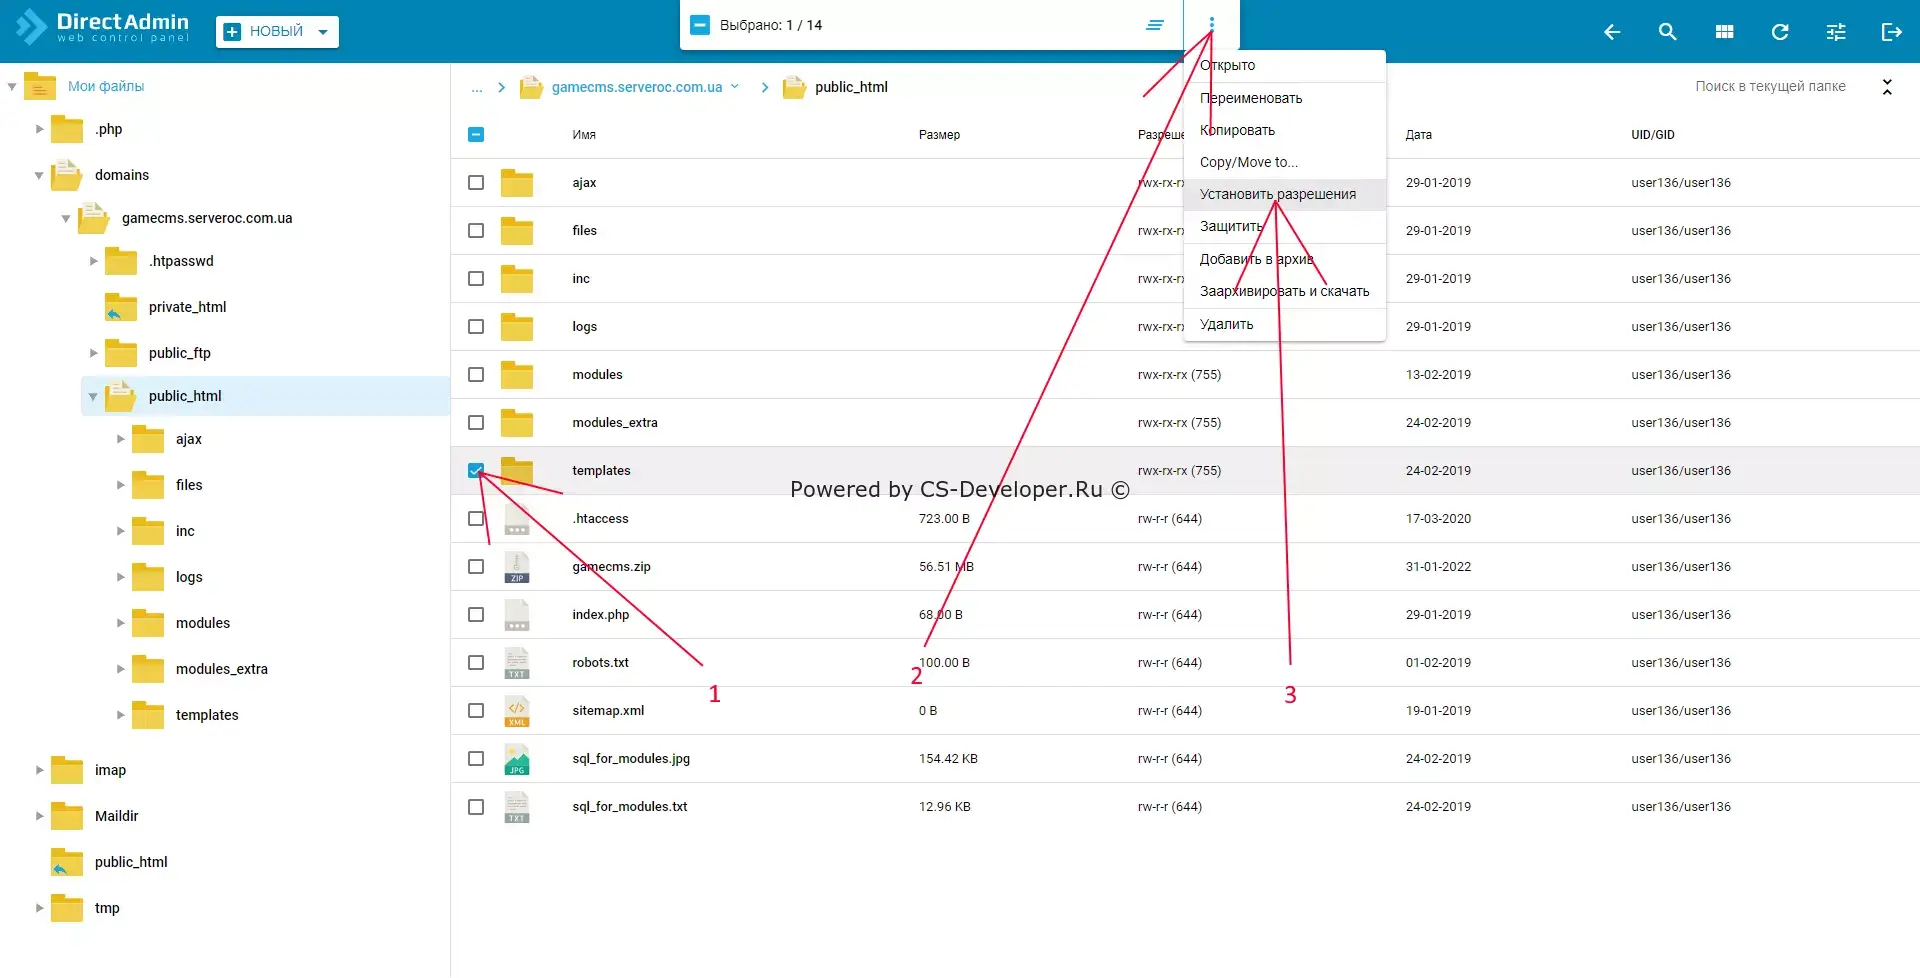
Next, be sure to grant the necessary permissions to the directories and files. To do this, select the required files using the checkbox to the left of the file name, click the three dots in the top menu, and select "Set Permissions"
In the pop-up window, set the required permissions, make sure the Recursive toggle is set to the right, and click the "Save" button
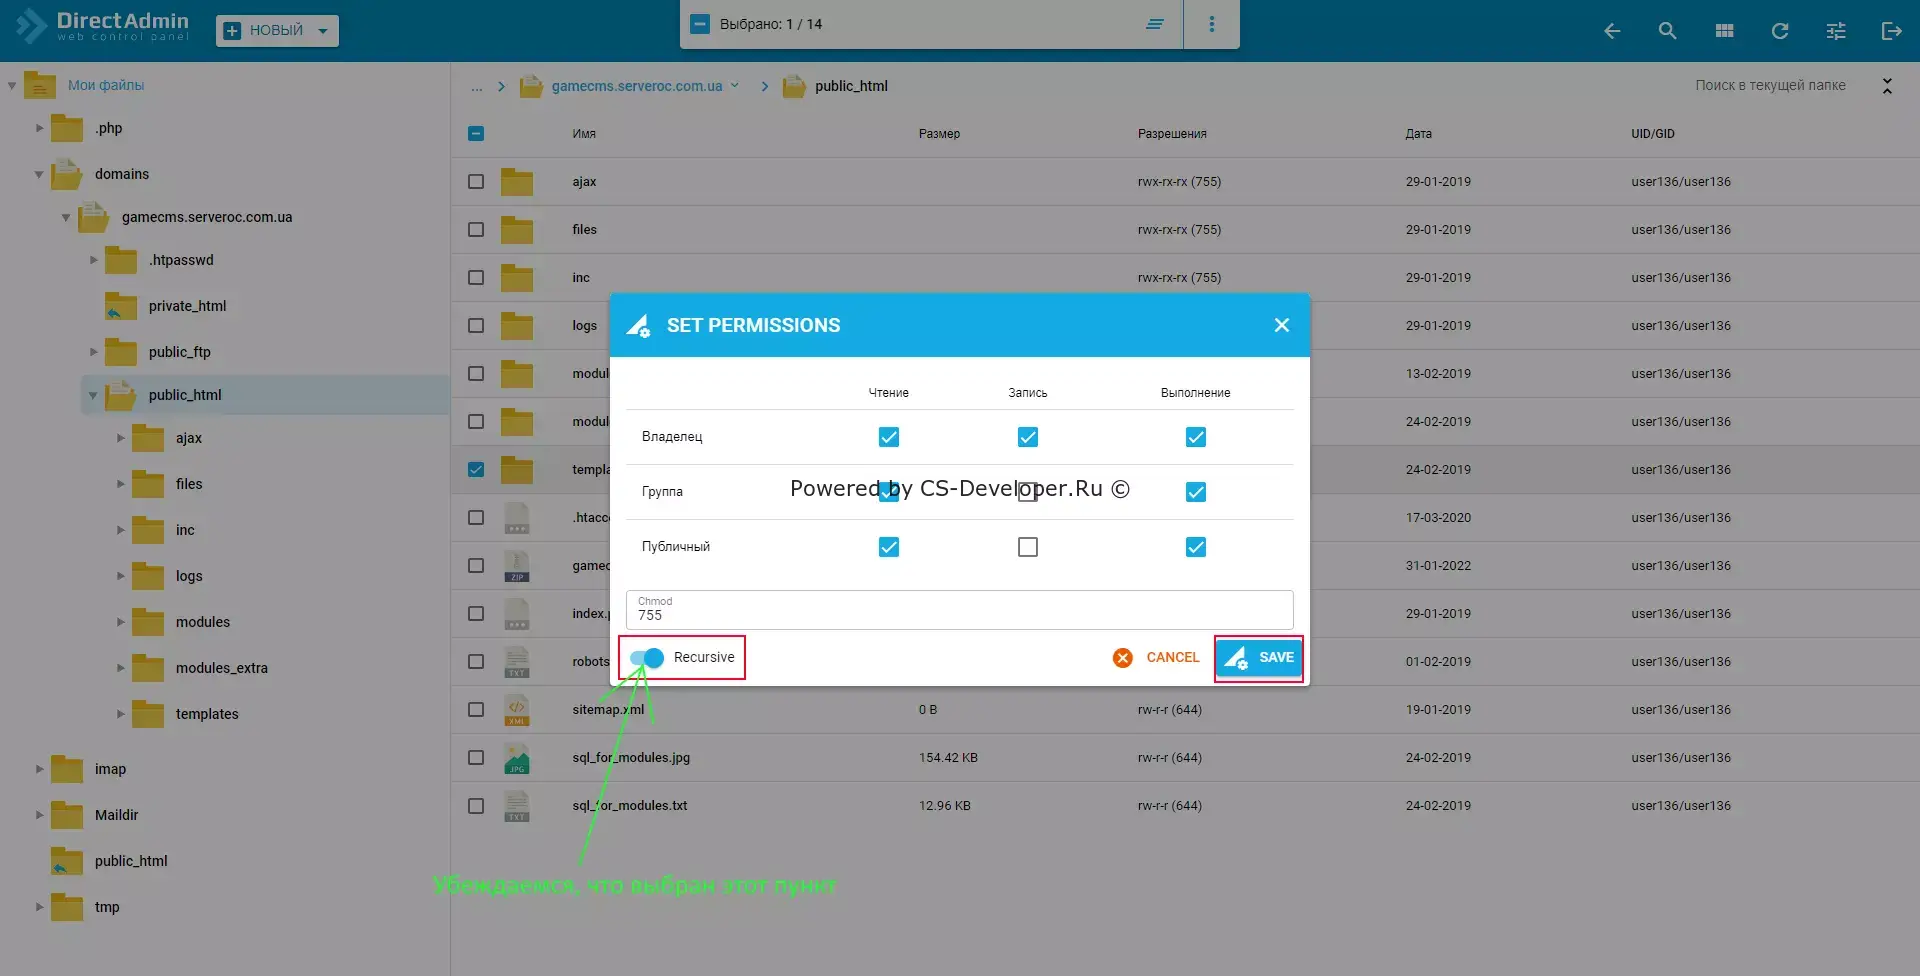
Next, perform this operation for all files and directories according to the official GameCMS instructions:
1. Установите атрибуты 775 на все папки и входящие в них подпапки
2. Установите атрибуты 664 на все файлы
3. Установите атрибуты 777 на папки и входящие в них подпапки и файлы:
inc/db.php
files/
logs/
templates/
Part 2: Creating and configuring a MySQL database
On the control panel home page, select the "Account Management" section and the "MySQL Management" menu item
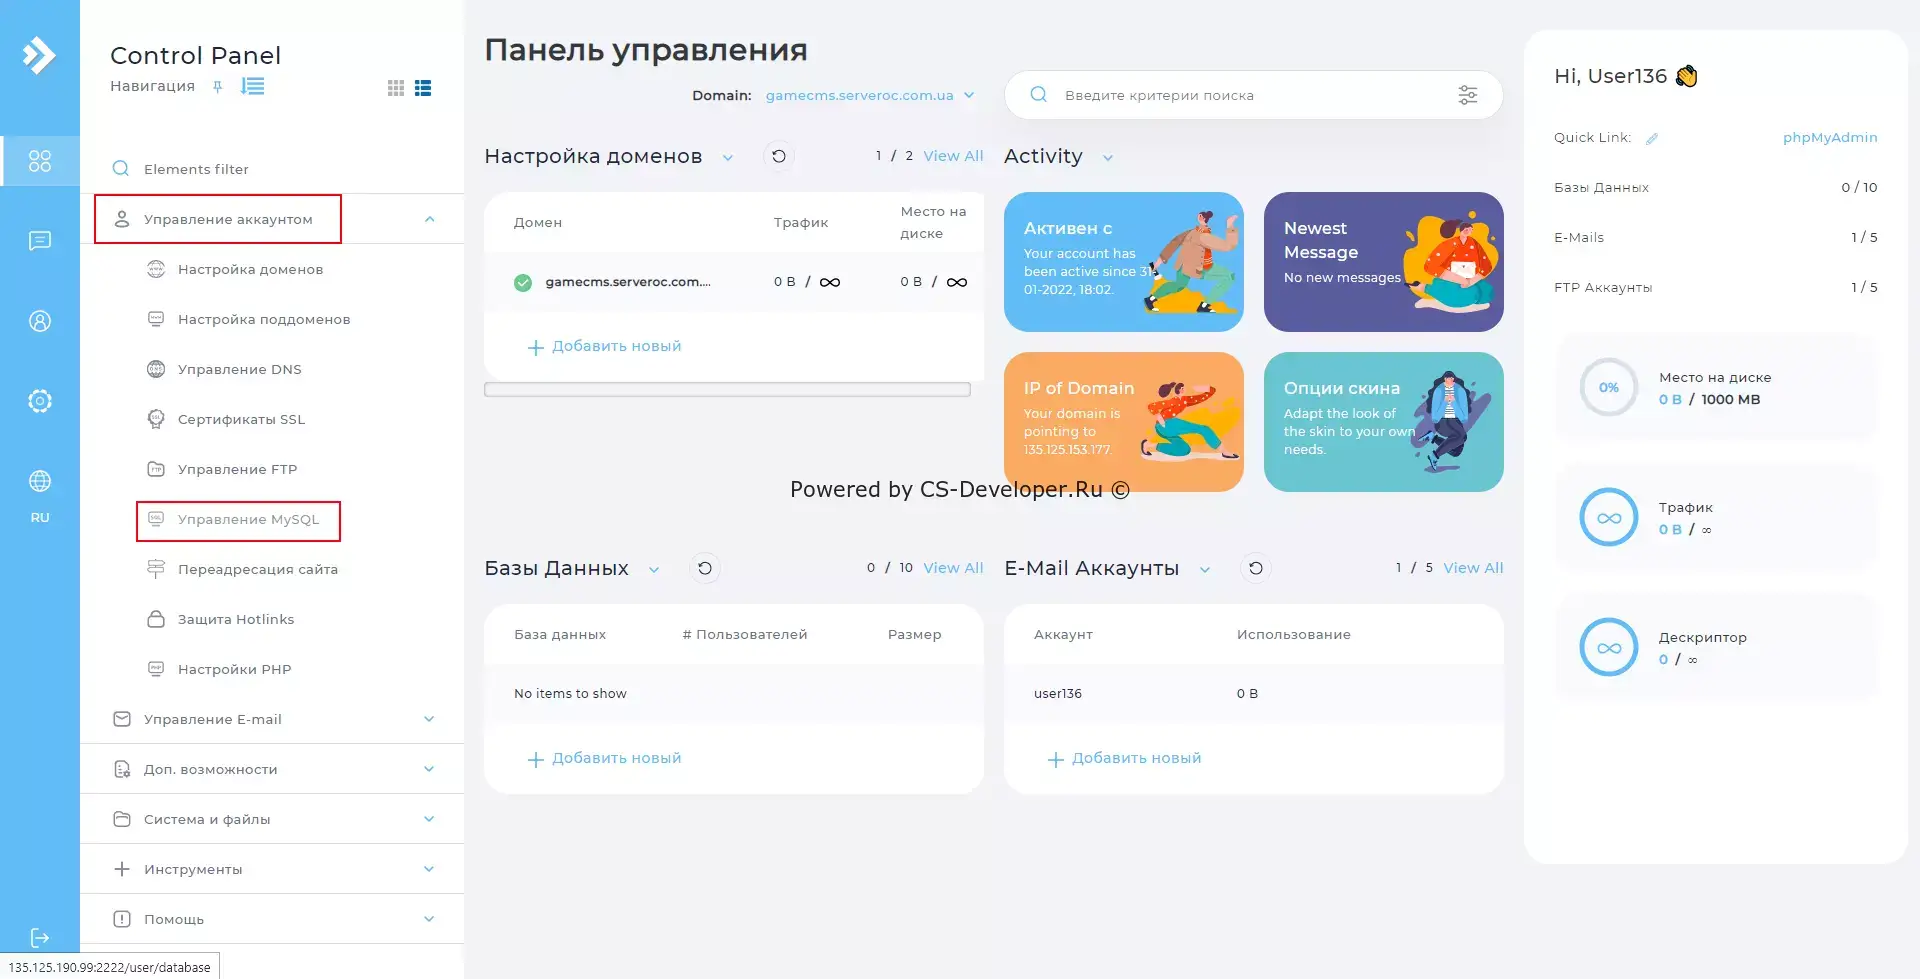
Click the "Create New Database" button
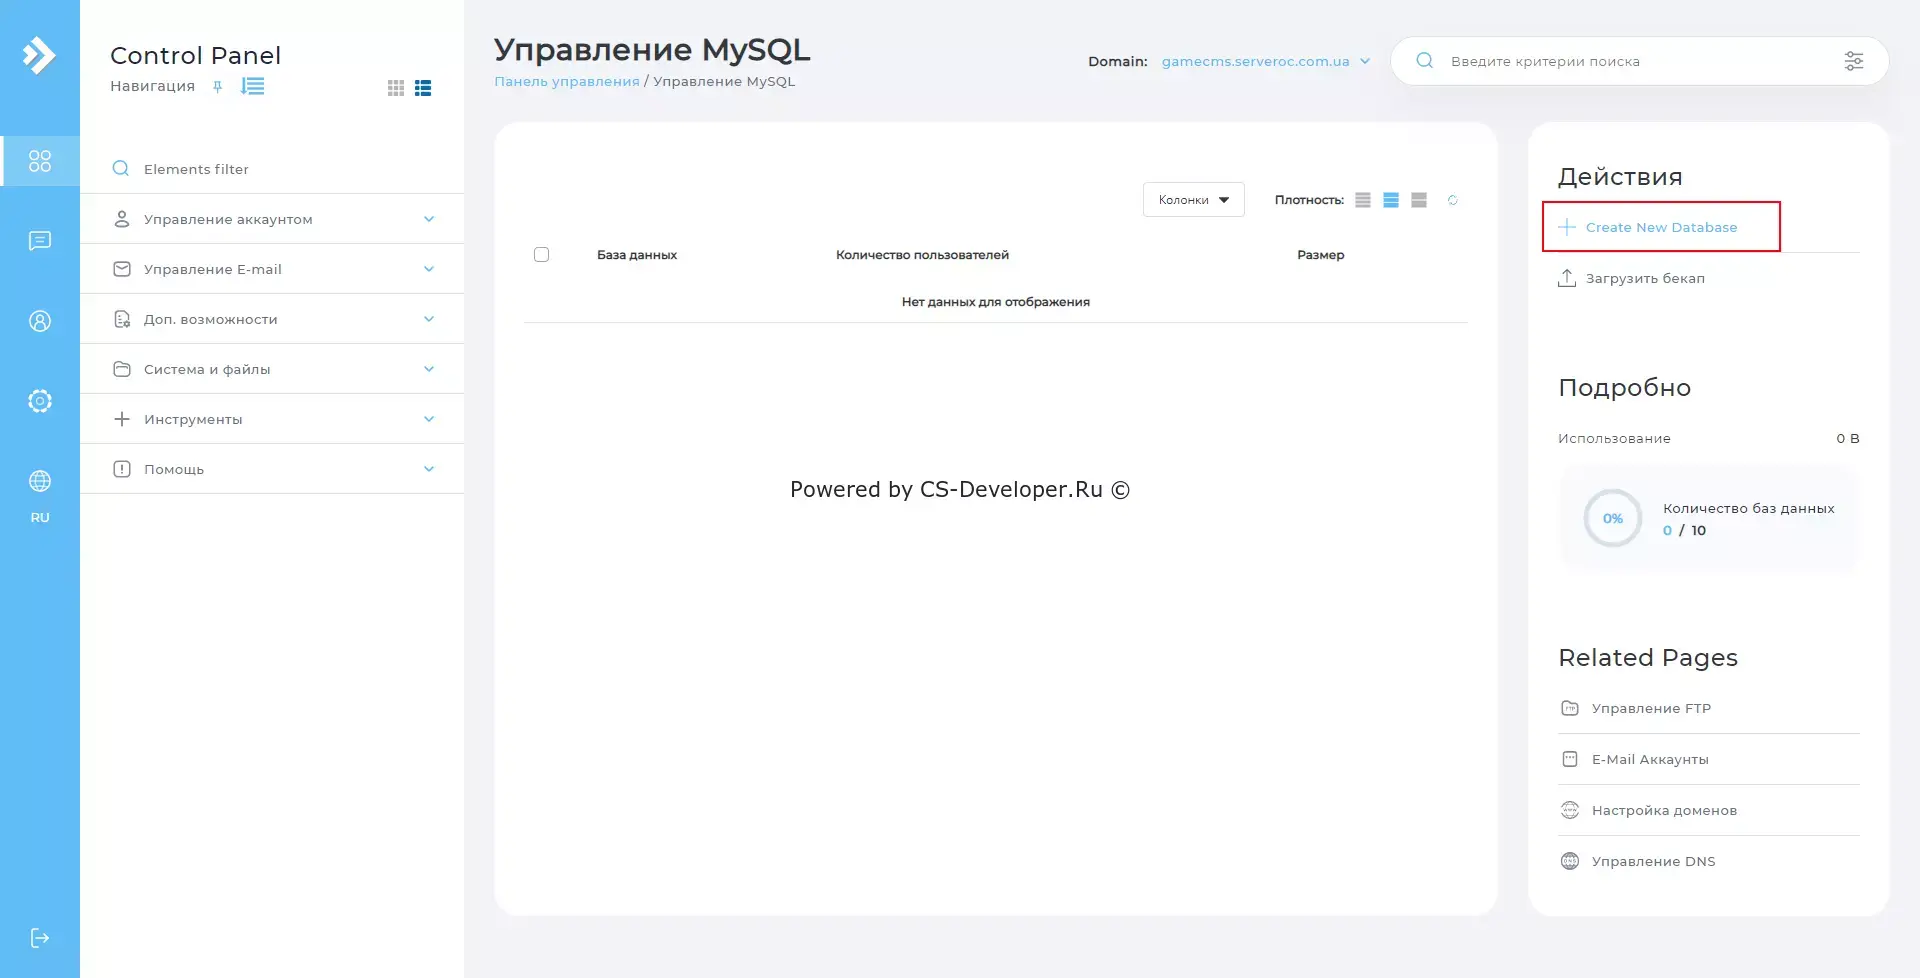
Next, enter the desired database name, and if you wish, you can choose a randomly generated password or enter one yourself. Then click the "Create Database" button
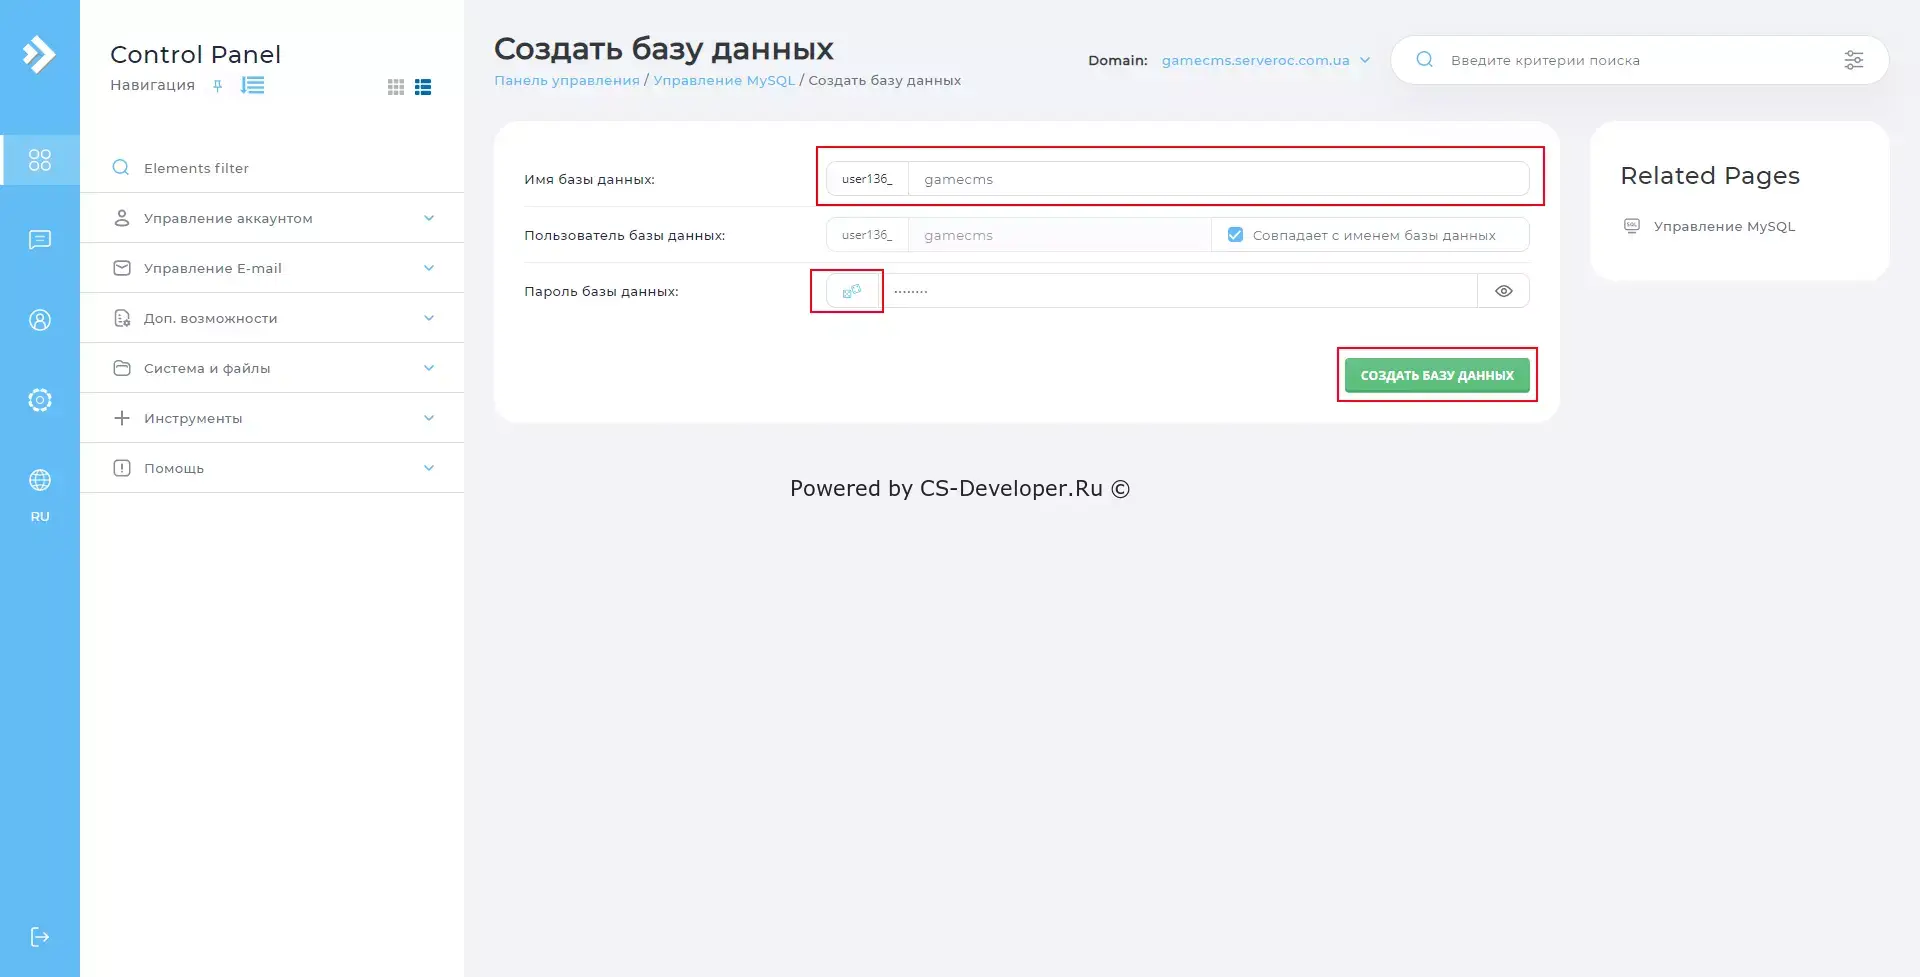
A window with your MySQL login details will appear; save them
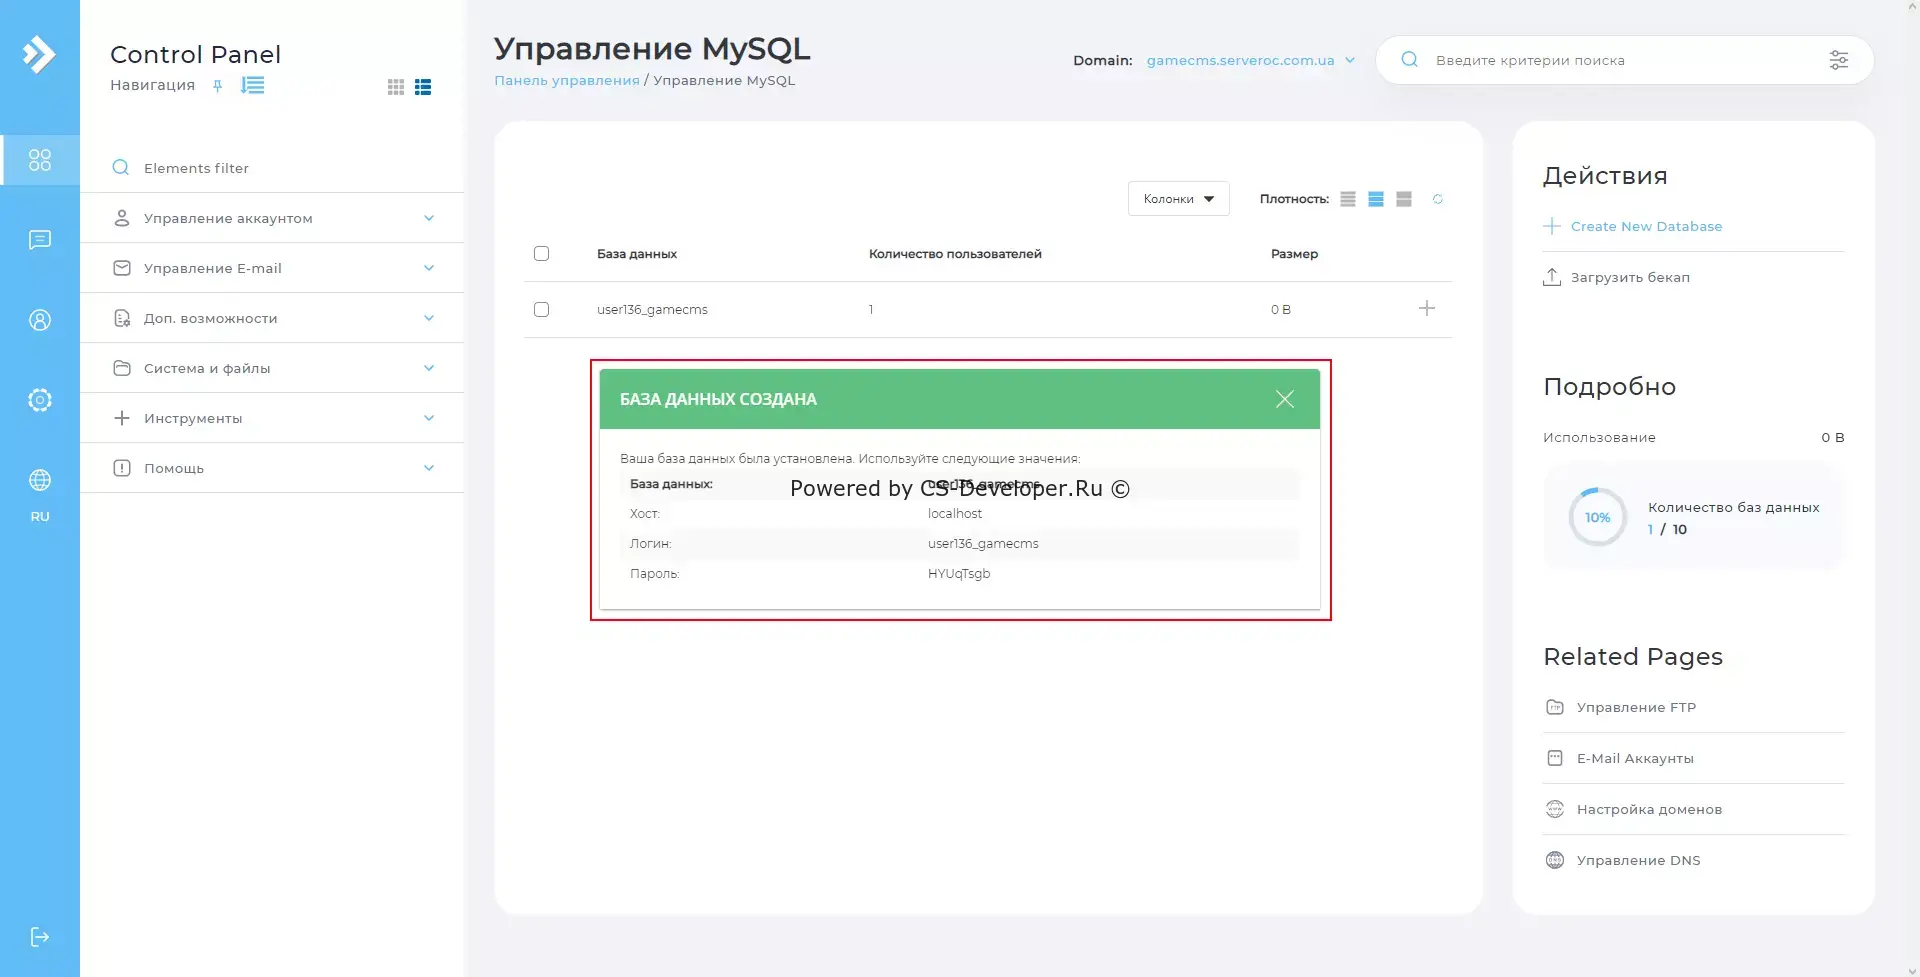
Part 3: Starting the script installation
Go to the link http://вашсайт.домен/ (in our case, gamecms.serveroc.com.ua)
You will be greeted by the GameCMS installer window. Fill in all the required details using the information obtained in the previous section, click the "Check connection" button, and if the connection is successful, click the Install button.
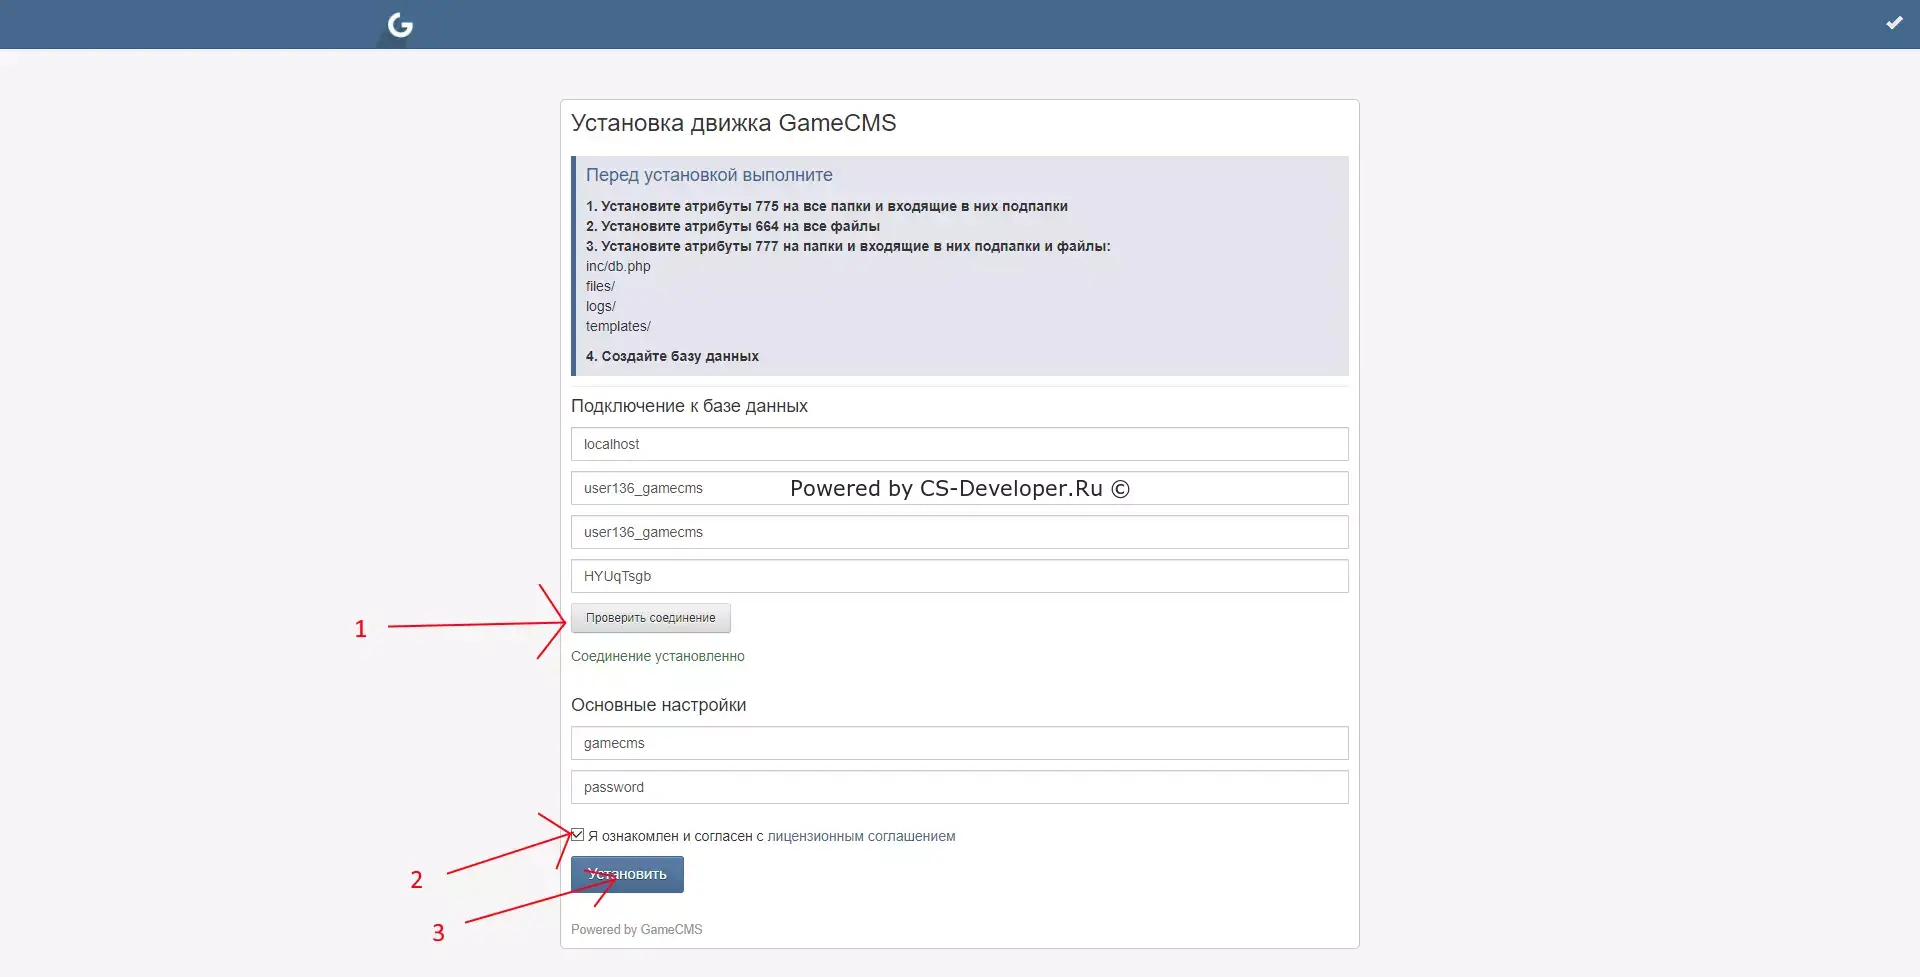
After successful installation, the script redirects to the GameCMS home page.
To log in to the admin panel, you will need to edit the script's config. To do this, go to the file manager as described in the first part of this guide, and navigate to domains/gamecms.serveroc.com.ua/public_html/inc/ (Replace gamecms.serveroc.com.ua with your domain)
Select the config.php file for editing by double-clicking it, and find line number 35
$host ='gcms.overcs.ru';Replace "gmcs.overcs.ru" with your domain (in our case, gamecms.serveroc.com.ua), and click the Save button!
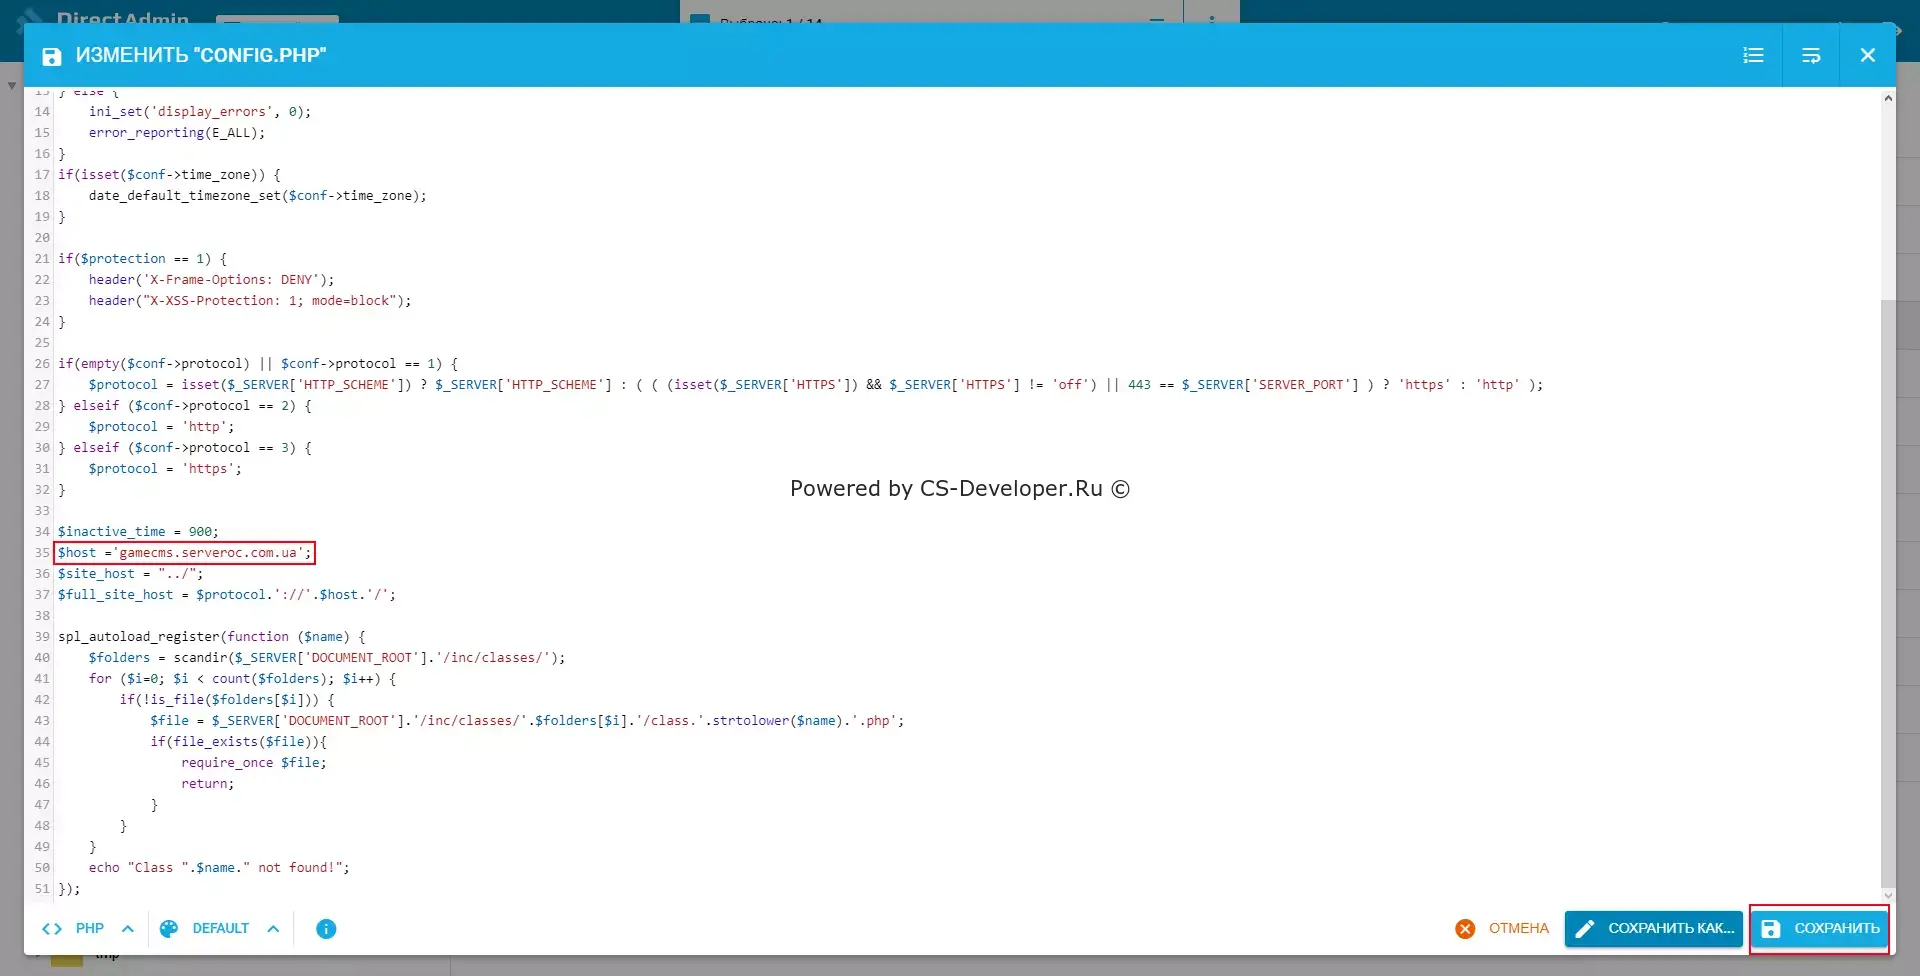
In this guide, we used a version of GameCMS that you can download below, as it is guaranteed to work and has no vulnerabilities.
Conclusion
If you encounter errors while installing the script but are sure you did everything correctly, try contacting the hosting provider's support team; they will most likely help you resolve the problem
Features of using web hosting from CSHOST.FUN:
Since the DirectAdmin control panel is used, many actions become faster to perform, and the LiteSpeed web server is also used along with the control panel. Because of this, some misunderstandings may arise, such as when navigating to any page immediately after installation, the web server returns error 404 - don't be alarmed, this is normal. Since the LiteSpeed web server is designed to work with high-load applications, it uses every possible method to reduce resource consumption. Therefore, .htaccess files are not loaded with every request to the web server (as, for example, with Apache), but once every few minutes (on the hosting shown in this example, once every three minutes), so you should wait those three minutes, and everything will work perfectly.
We also use the LiteSpeed web server, because under the same workloads it shows much lower resource consumption compared with the same popular Nginx and Apache. You can read more in this mini-test: Which web server is better?
Comments (0)